techTianjin
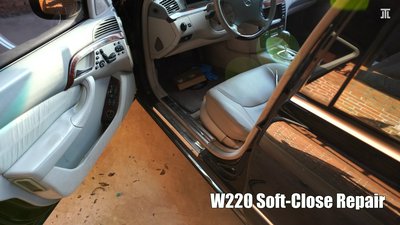
Mercedes W220 S-Class Soft-Close Trunk and Soft-Close Doors DIY Repair
This serves as a guide for those who want to repair the soft-close functions (doors & trunk) in their W220 Mercedes S-Class but haven’t found clear views of the steps online.
The soft-close features for my trunk lid and both front doors broke over the course of last year. In the last couple of weeks, I repaired them. This serves as a guide for those who want to carry out the same repairs but haven’t found clear views of the steps online.
First, the trunk lid.
In all W220s, the trunk lid is closed in the end by vacuum. When that fails, the trunk lid is latched but not fully closed. While it probably wouldn’t just pop open, one is advised to close it fully by hand.
A common fault involves fissures in the plastic valve block. Getting to this valve block is quite simple:
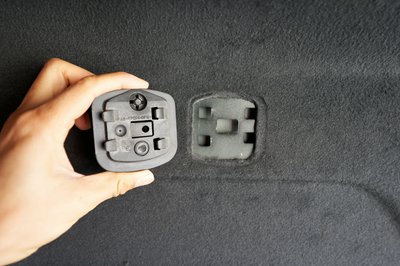
We first undo the trunk lid liner, which is self-explanatory. The puzzling piece is the plastic lock for the warning triangle. This can be unlocked with a pick, a needle-nose plier, or a small screwdriver and slid out.
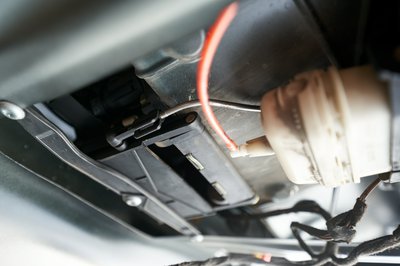
Before removing the trunk lock assembly, we should release the rod from the mechanical key unlock. This black plastic piece looks very fragile, and care must be taken not to break it.
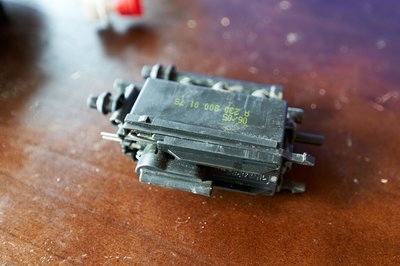
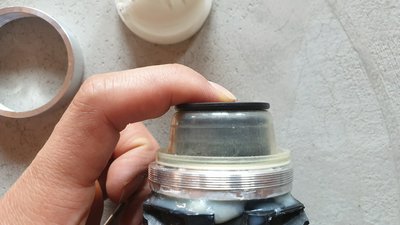
Once the rod is released, we can remove the trunk lid lock assembly and separate the valve block from the vacuum spheres. Everything is quite self-explanatory here.

From the photo, you can clearly see that a crack has developed in one of the ends of the plastic valve block. Personally, I think Mercedes should’ve fused these openings rather than pressing in a ball bearing. Even better if they used aluminium to manufacture this block.
The fix involves using epoxy to seal off all the ports with ball bearings.
While in there, I also added some zip-ties for the white locking sphere and epoxied the black unlocking sphere.
The harder job to do is with the doors.
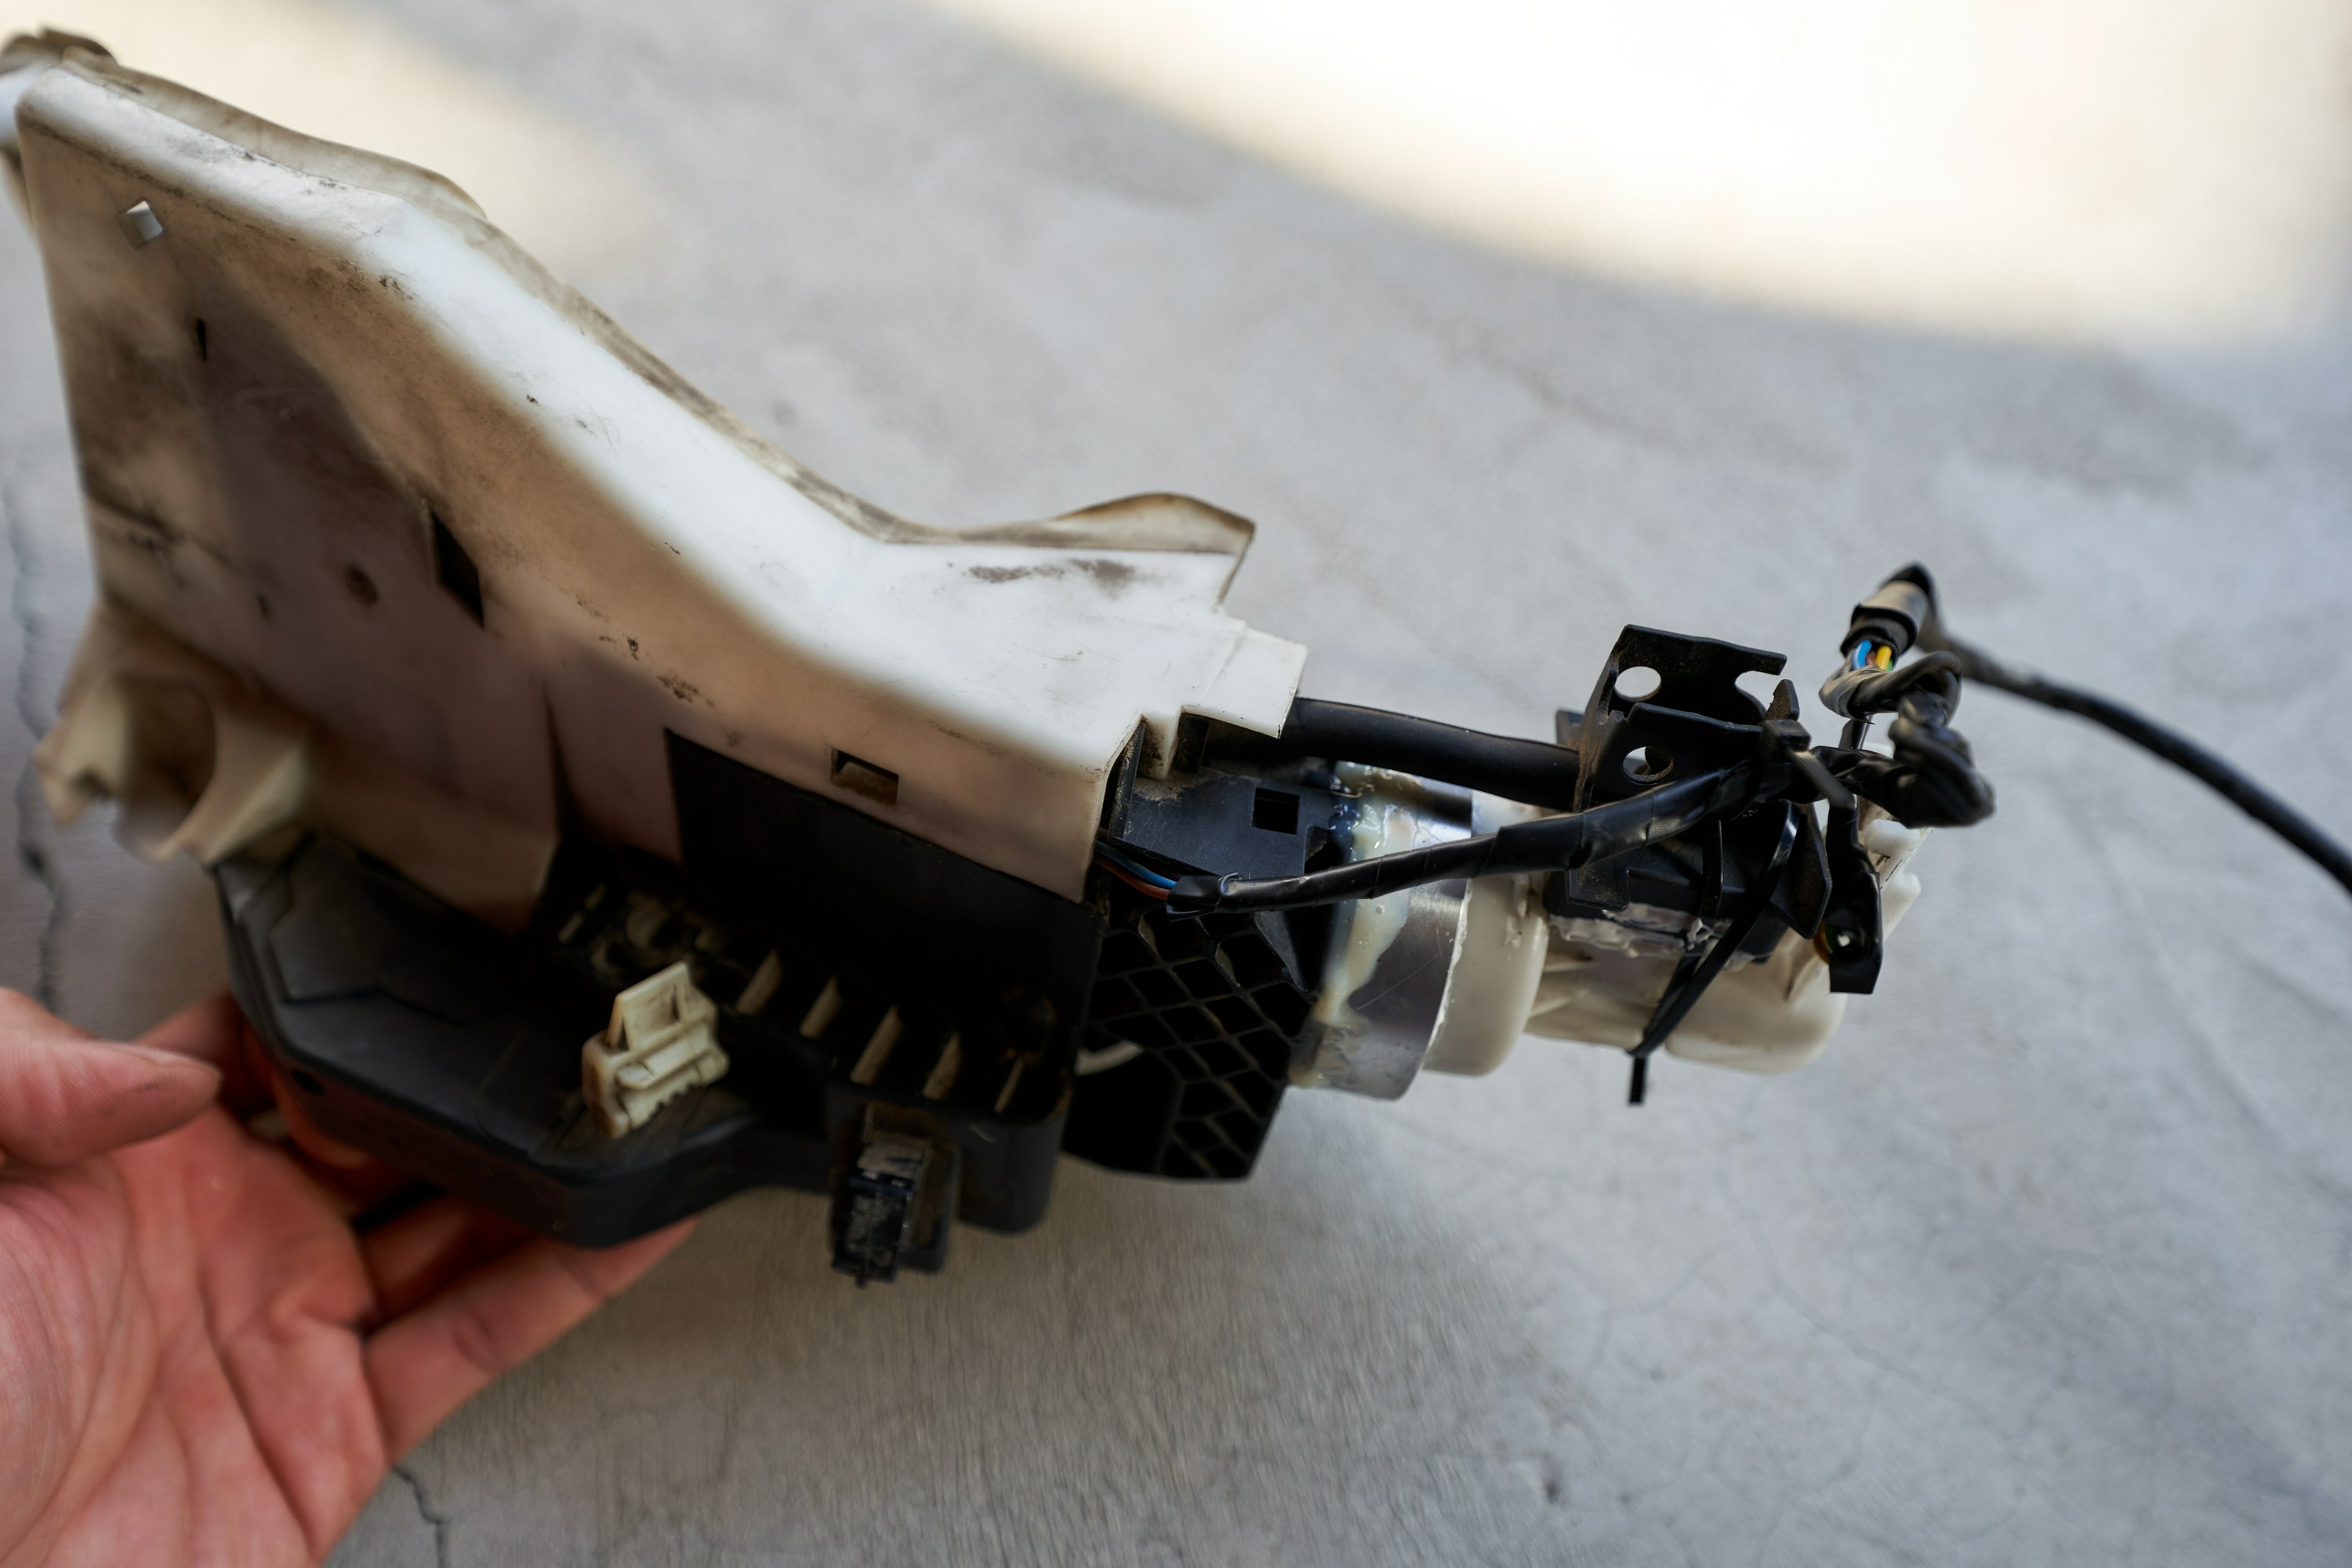
First, we need to remove the inner door panel. This is quite easy and rather self-explanatory. You can find many sources on how to do it online. In my case, I also removed the right front mirror for some wiring repairs. In the photo below, you can see the three connectors for the Keyless GO functionality: from top to bottom: the Keyless GO lift solenoid, the antenna, and the door handle switches. The top one joins the 4-pin blue connector from the door control module; together, they lead to the door lock. The bottom one is tied to the door lock in the back, which we can’t see, and must be freed in order for the lock to be removed.
We also need to drill out 4 rivets: three for the window guide, and one on the prop for one of the screw-mounting points for the inner door panel.
Before removing the lock, we should free the aforementioned cable. We also need to release a metal rod from the door handle. This rod is similar to the one we have seen in the trunk lid. The plastic piece that holds it is in this case white and stronger. We have no choice but to release it blind.
Once the rod is freed, we can remove the door lock by undoing 4 T30 screws.
In the photo, you can see the white plastic lock for the door unlock rod. Below it, there is a black cable holder. This is for the keyless go switches in the door handle.
The solution is to use an aluminium repair kit that is stronger than the plastic tabs Mercedes used.
First, I had to remove the tabs and grind down the white and black plastic parts.
Now, the first time I tried, I made a mistake and failed to understand how the diaphragm seals. In fact, I was wondering the whole time how the diaphragm could seal with the way I installed it.
One piece of advice in retrospect: test the soft-close function before installing the lock. Just connect the yellow vacuum line and the blue connector, clear the codes for the PSE and the door control module, and push in the door lock tab half-way. If soft-close works, it should pull the tab fully shut. If it leaks, it’s not put together right.
Unfortunately, I figured this out after installing it in the door. I also added loads of extra epoxy. This made redoing the job rather difficult.

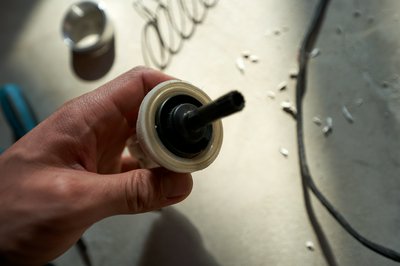
In order to figure out how the diaphragm works, I unscrewed it from the lock. As you can see in the photo, the diaphragm should be held in the groove inside the white plastic part, which presses the edge of the diaphragm to the lock. With the repair kit, the black plastic section is replaced with aluminium. The edge of the diaphragm must be pressed against the raised edge of the aluminium part, as shown in the video (below on YT).
Once I figured this out, it was easy to screw on the other half of the aluminium repair kit and call it a day.
Installation is the reverse of disassembly. For the rivets, we need M4.8 by 8 stainless steel rivets.
Finally, confirm that everything is in order, clear the codes, and test the window and soft-close function again before installing the inner door panel.
Lastly, the driver’s door is further complicated by the infrared sensor. Here, we need to remove the mechanical lock cylinder with a T15 screw and detach the wiring to the sensor.
While this is quite simple, another complication of this complication is that the wiring for the infrared sensor is wrapped together with the wiring for the airbag. We need to disconnect the battery, disconnect the airbag after 30 minutes, and release the airbag wires. In the video (below on YT), you can see how the connector is slotted into the door frame at an angle and locked in place with a twist.
Those who are keen observers will notice that in my case the driver’s door lock is not original, probably replaced by the previous owner. Unfortunately, it’s not even the right part, lacking the Keyless Go lift solenoid.
Below video uploaded to YT:

Gallery: W220 Soft-Close DIY
Tianjin